Lighting
The Light Source Editor
Live Home 3D lets you create and edit light sources. To open the editor, tap and hold your finger on an object for a few seconds in order to bring up the context menu. Then select Edit Light Sources…
The functionality described in this section is only available in the Pro edition.
The term "lamp" will be used in this section for any object that emits light (lamp, candle, fireplace, and so on). The term "light source" will be used for a part of a 3D model that simulates a single light source and is actually a source of light in the 3D scene. One lamp can have one or more light sources.
Main Elements of the Light Source Editor
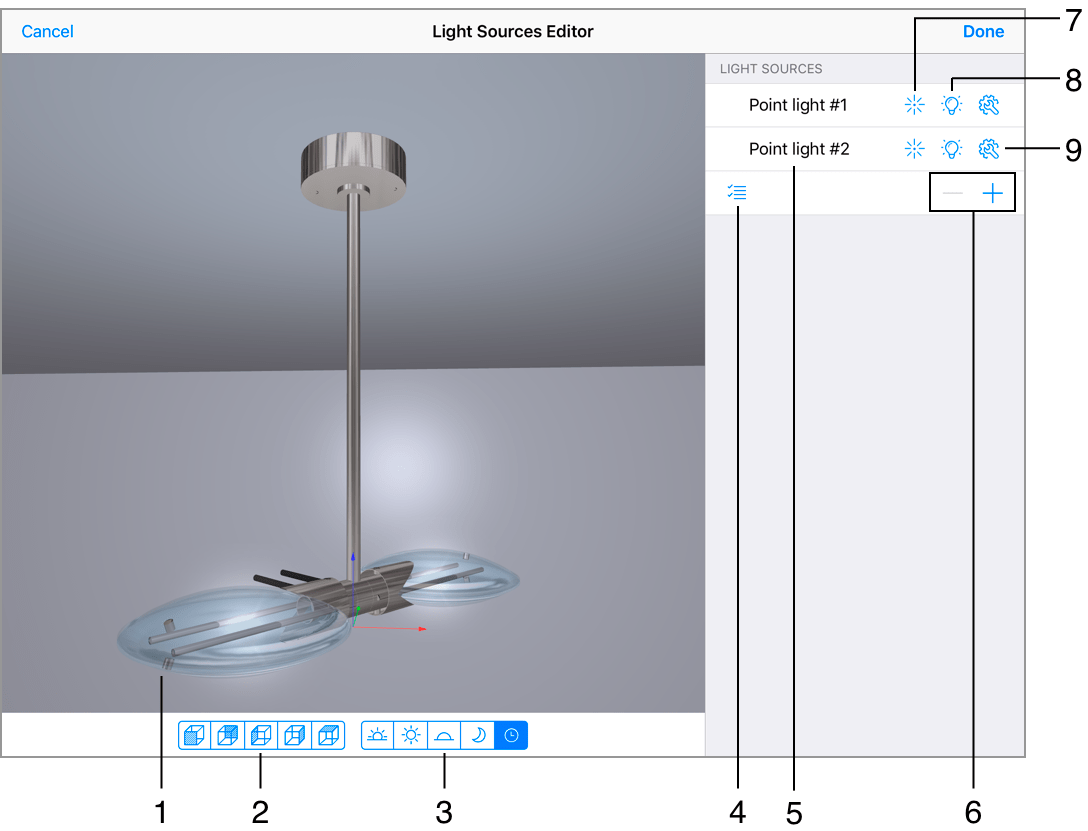
1 – The preview.
2 – Choose one of the predefined points of view.
3 – Choose the time of day to preview a lamp with different lighting conditions.
4 - Enable or disable the possibility to select several light sources in the list. Once several light sources are selected at the same time, you can change their properties simultaneously (e.g. turn on/off, change the color, and so on).
5 – The list of light sources. Tap on the light source name to select it.
6 - Delete or add a light source.
7 - Choose the light source type: directional or omnidirectional.
8 - Turn a light source on or off.
9 - Open the light source properties.
The Properties Panel
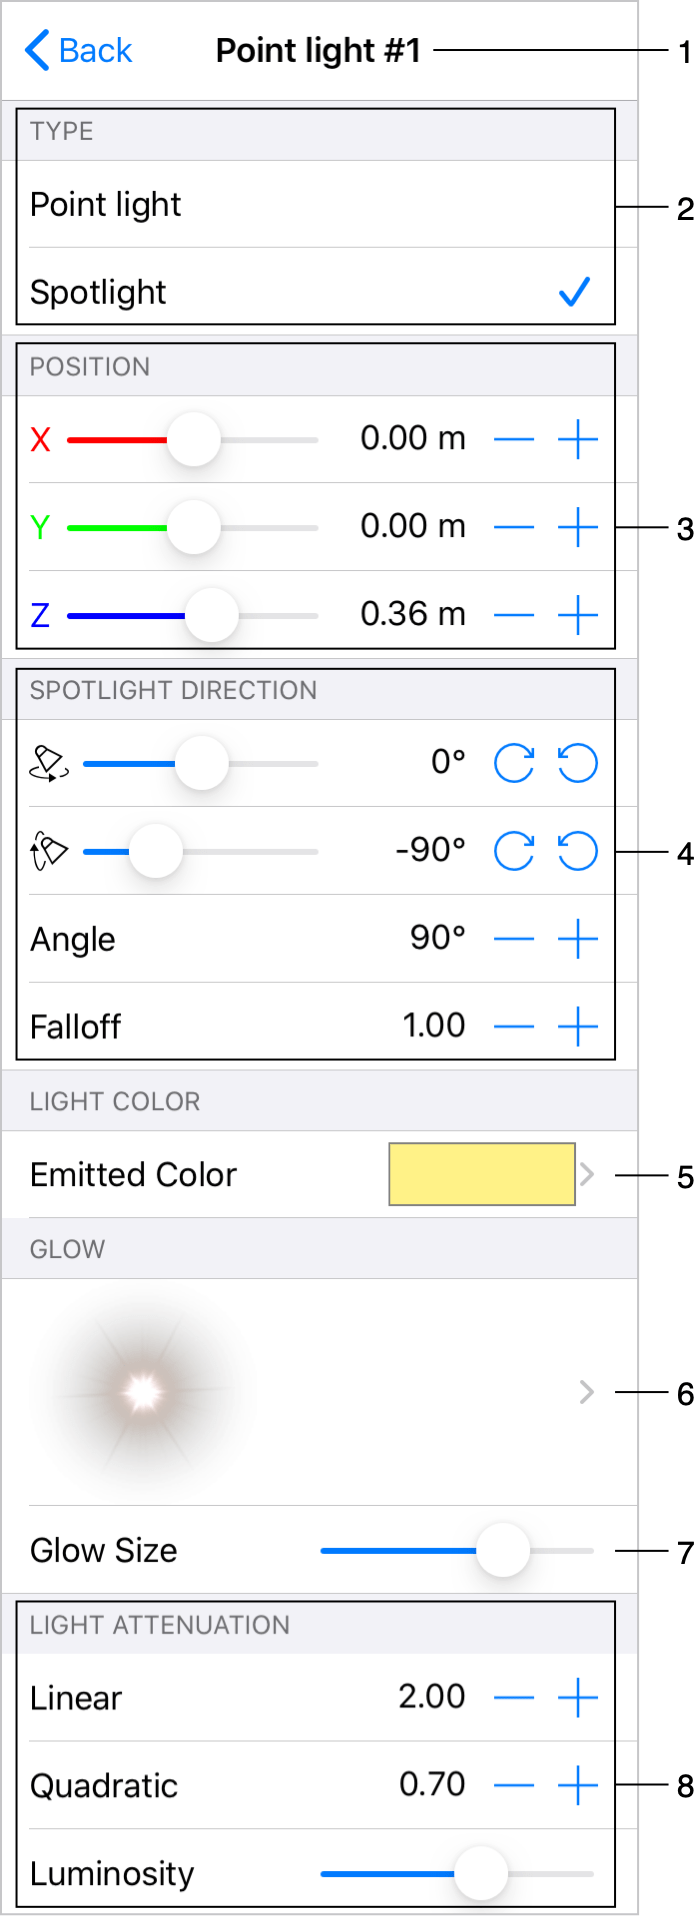
1 - The name of the currently selected light source. Multiple sources can be listed here.
2 - Light source type. Choose Spotlight to have a directional light source, or choose Point light for an omnidirectional light source.
3 – The position of the current light source in relation to the lamp.
4 – Spotlight controls. They are available when the current light source is of the spotlight type. You can rotate a light source, and change the light beam properties.
5 – The color of the light source.
6 – The glow type.
7 – The size of the glow.
8 – The Light Attenuation and Luminosity settings. They define how quickly the light fades out depending on the distance from a light source.
Preview
The preview shows your lamp inside a small empty room. You can see how the light drops on the walls, floor and ceiling.
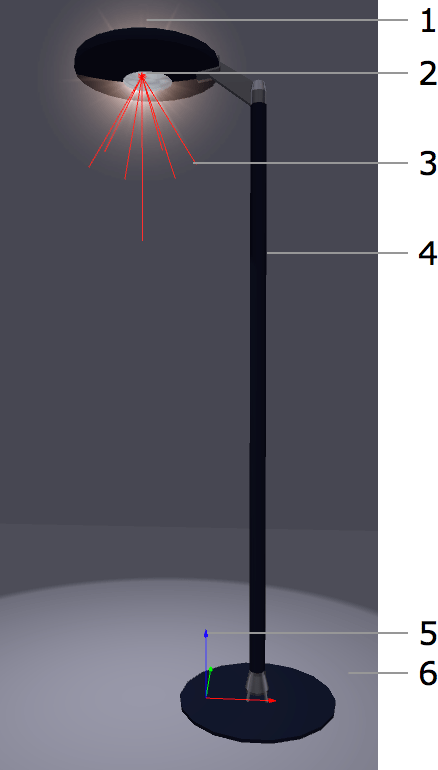
1 – Glow.
2 – Location of the light source.
3 – The angle of the light beam.
4 – A lamp object.
5 – The coordinate axes of a lamp indicate the point where X=0, Y=0 and Z=0. The colors of the axes correspond to the colors of the X, Y and Z coordinates in the Position section.
6 – Reflection of the light on the floor.
To change the point of view, press and drag the preview area with your finger. Use the pinch gesture to zoom in or out. To choose a predefined view, use the buttons below the preview. To restore the default view point and zoom, double-tap on the preview.
To preview a lamp with a different intensity of the ambient light, use the Time of Day buttons.
Light Source Location
To move a light source to another location, use the Position controls.
The location is calculated as a distance to the zero point of the coordinate system of the lamp. The zero point is shown in the preview as colored axes.
Light Attenuation and Luminosity
The Light Attenuation parameters Linear and Quadratic control how quickly the light fades out depending on the distance from a point in the 3D space to the light source.
The parameters are used by the rendering engine for calculating the attenuation factor:
Af = 1 / (Kc + Kl*D + Kq*D²)
Af – Attenuation factor; Kc – Constant (always 0.5); Kl – Linear; Kq – Quadratic. D – the distance from the light source to a point in the 3D space (when the app is calculating light for this point).
The Luminosity parameter changes the common luminosity of a light source. It does the same as the Luminosity control in the Light Properties tab of the Inspector.
Tip: adjust the Light Attenuation parameters when the Luminosity slider is in the middle.
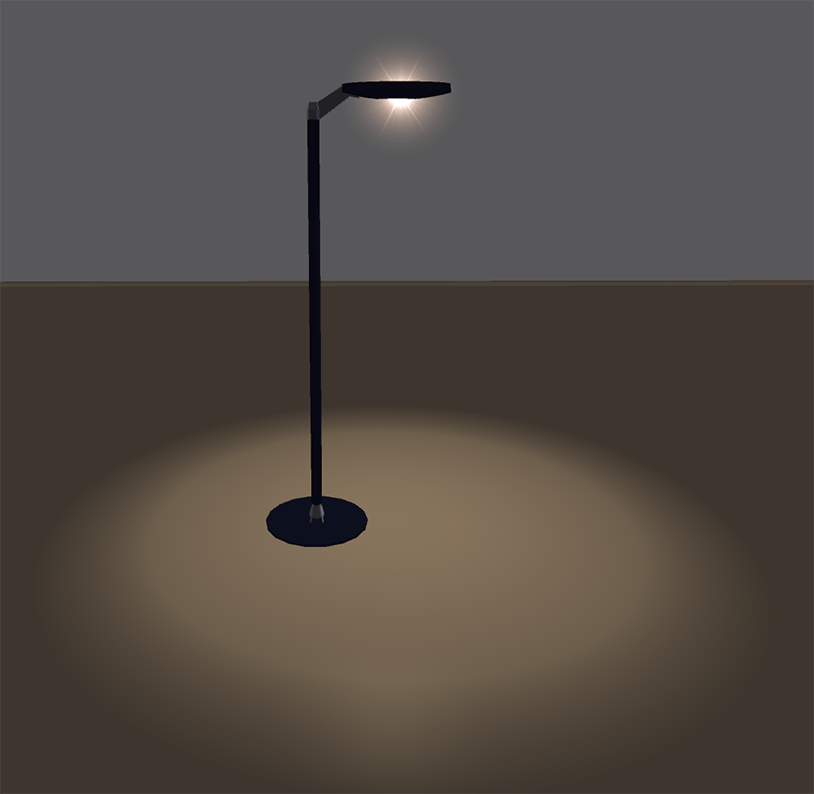
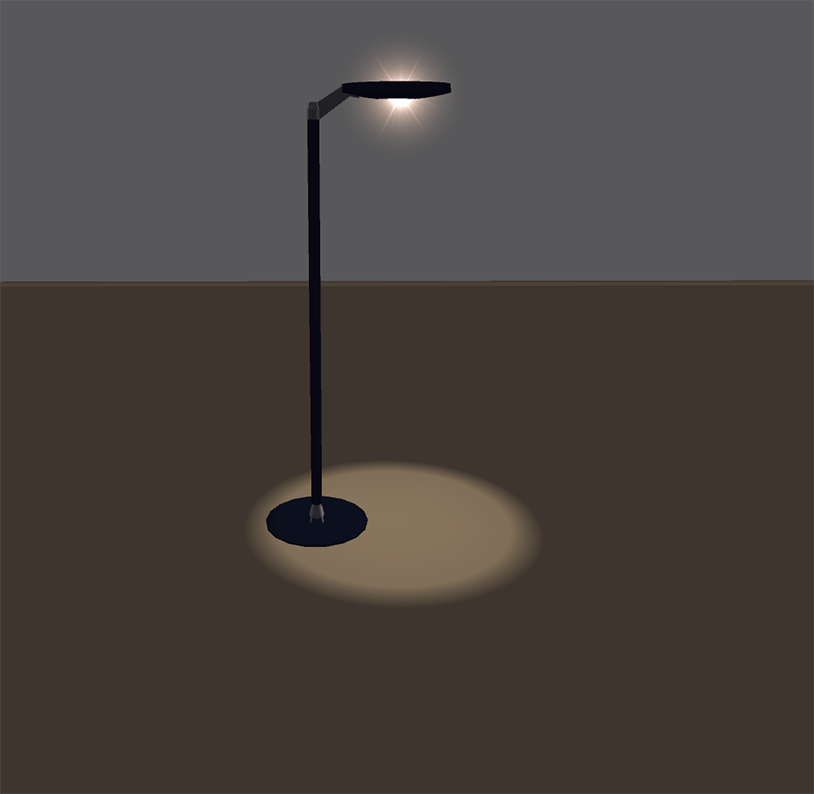
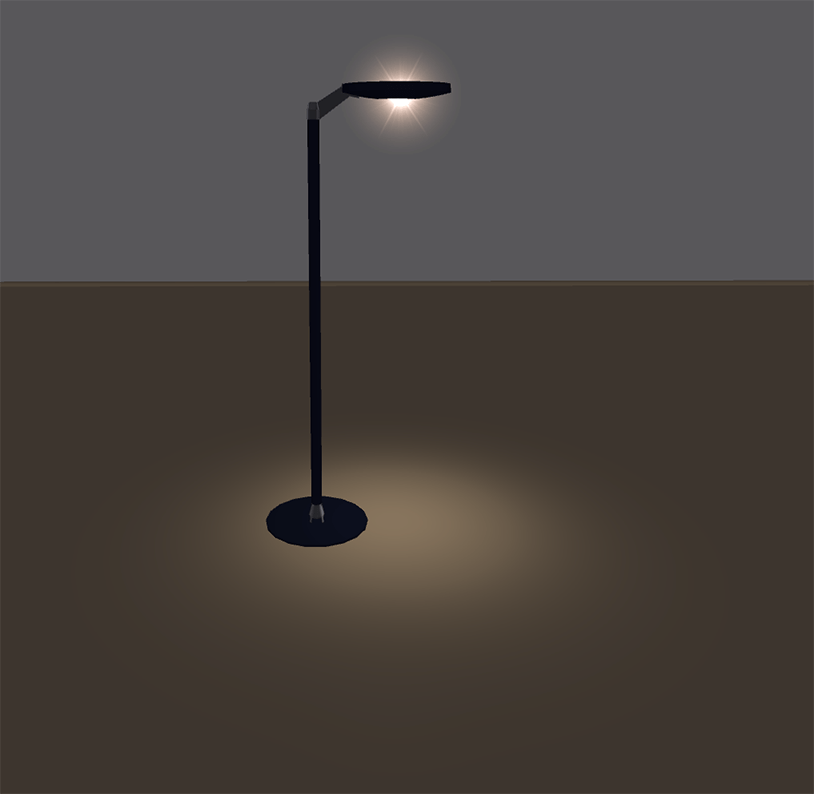
The images below demonstrate how the parameters affect the 3D scene.
Linear = 0.30
Quadratic = 0.00
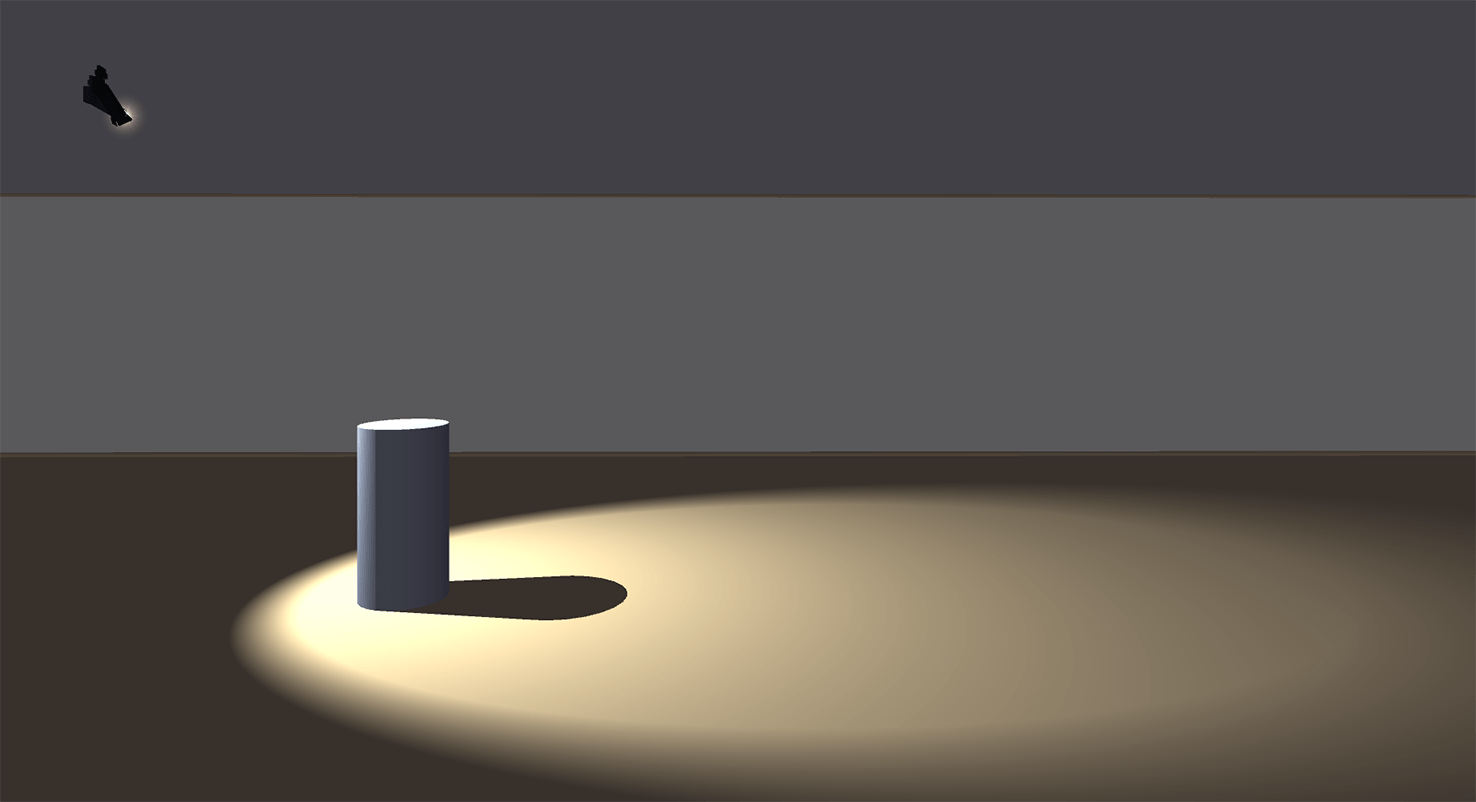
Linear = 2.00
Quadratic = 0.00
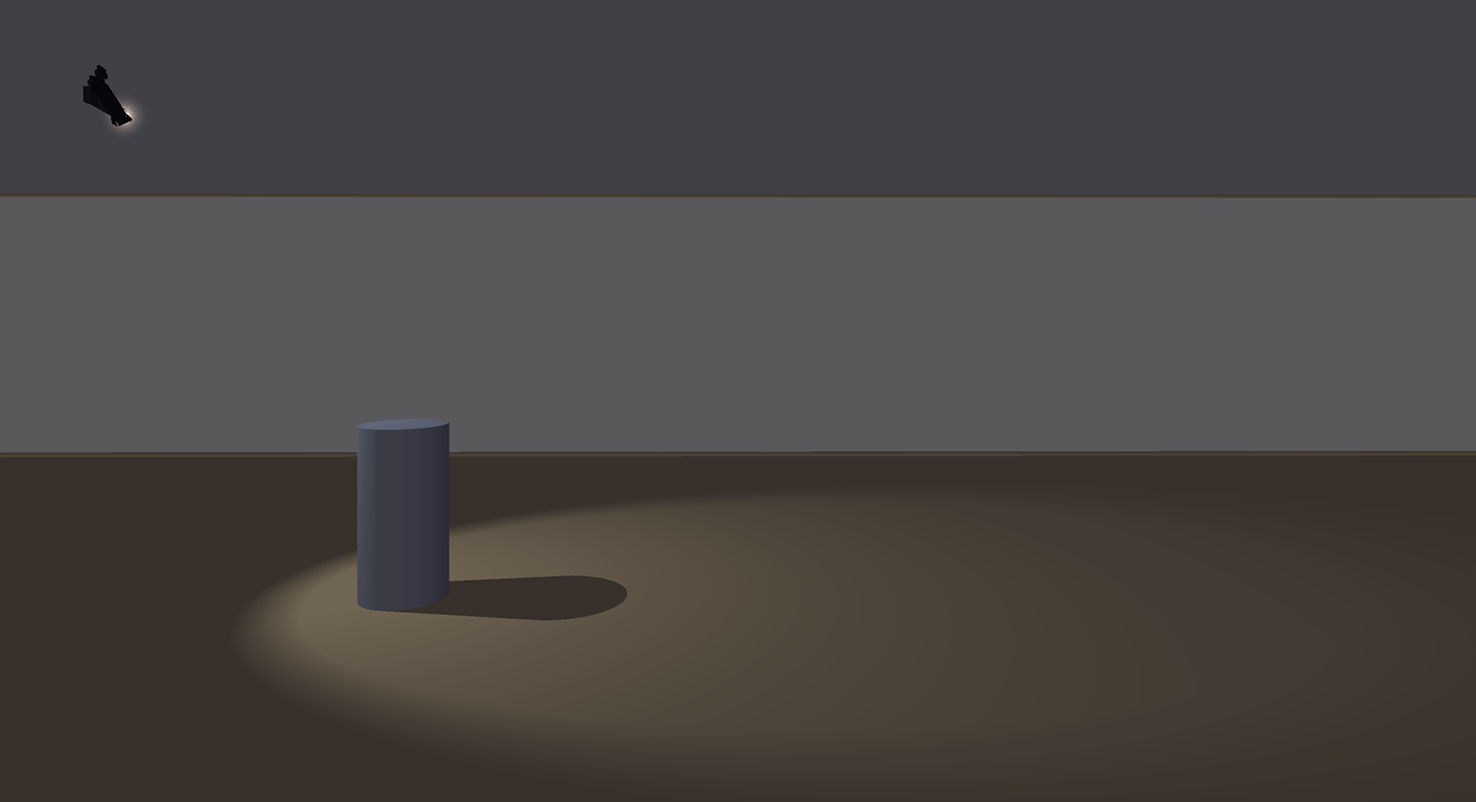
Linear = 0.30
Quadratic = 0.80
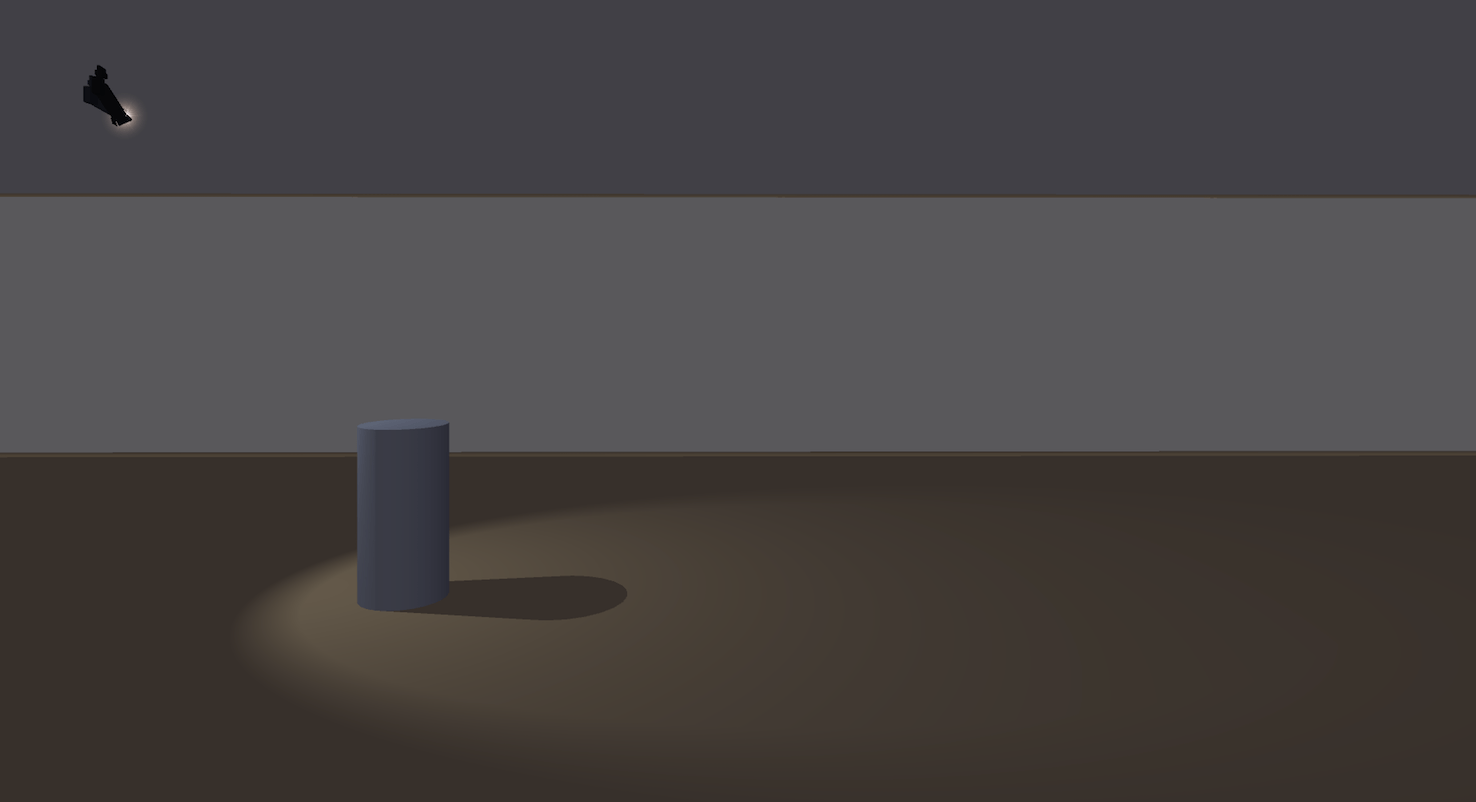
Directional Light Settings
A light source of the Spot type lets you set up additional parameters of the beam of light: Angle and Falloff.
