Small Difference in Levels
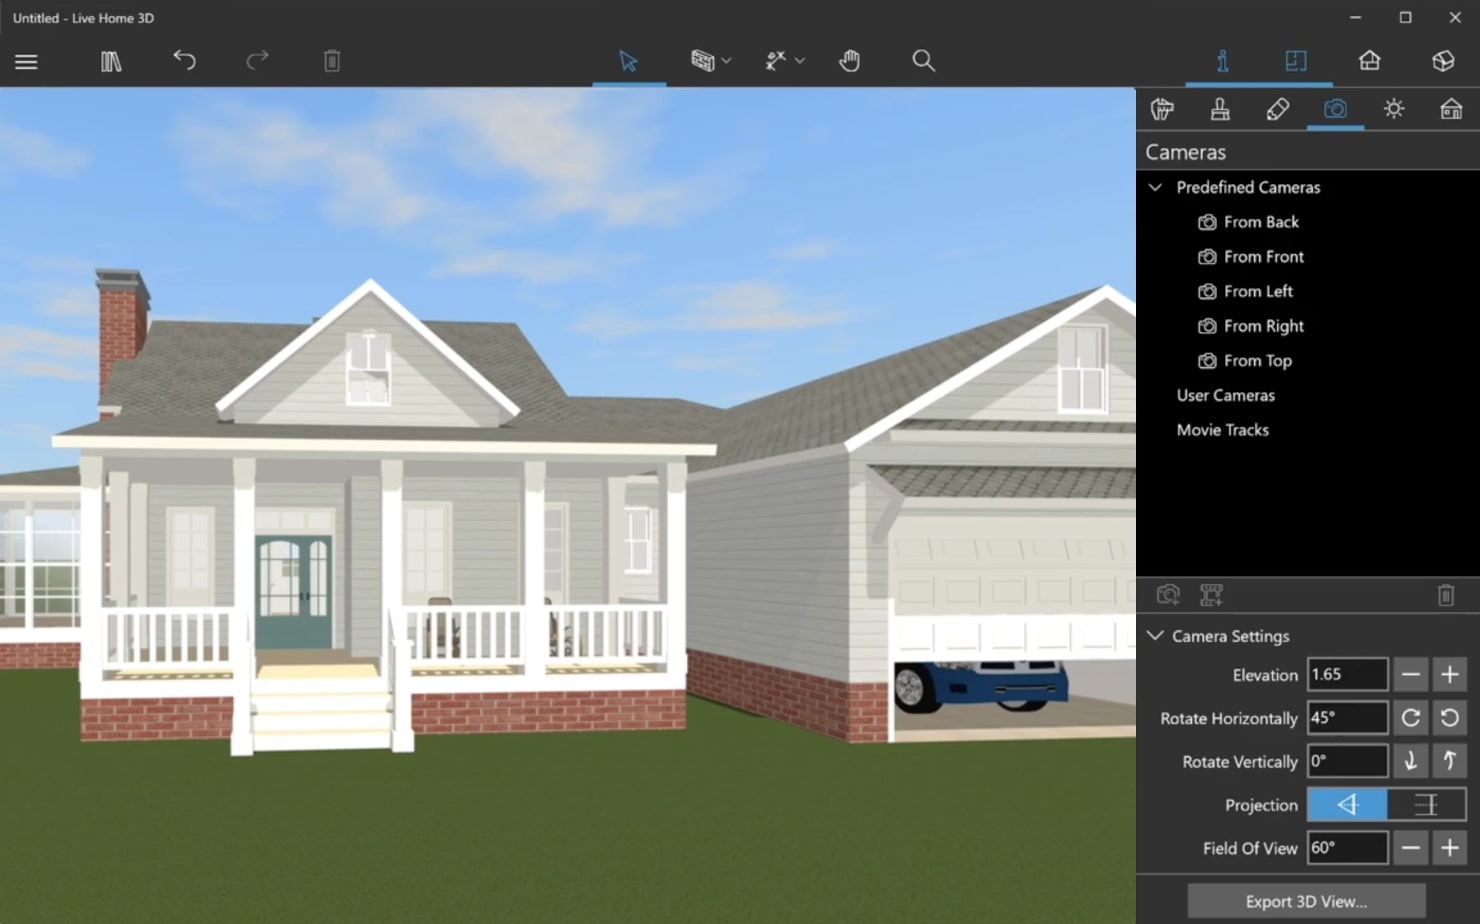
Let’s consider the first case in which two rooms are adjacent to each other, but there is a small difference in their levels.
Change Elevation to Negative Value
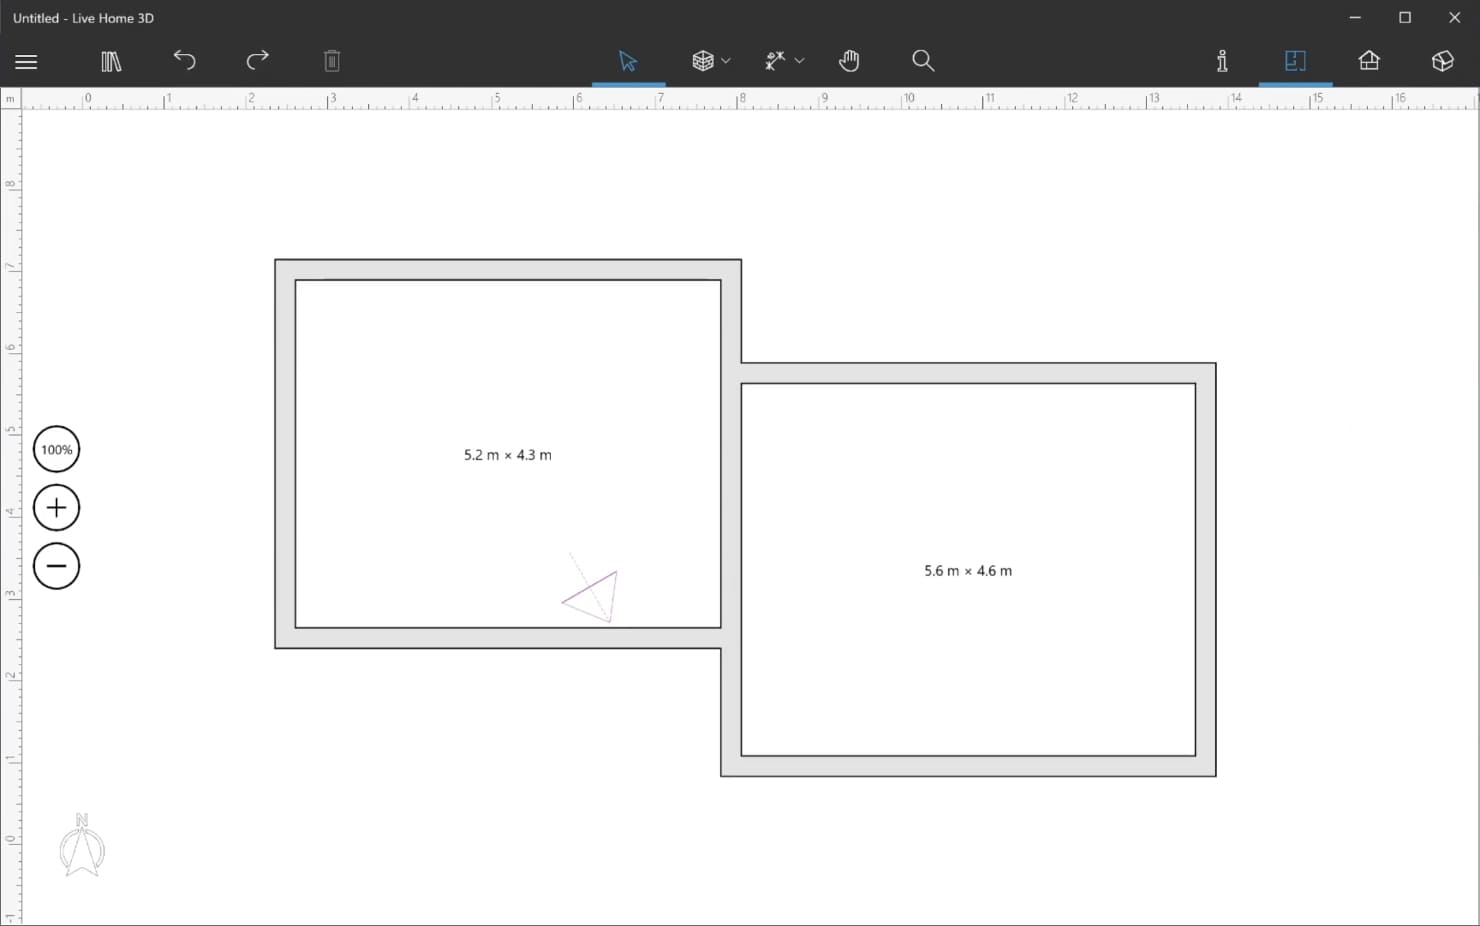
Use the Project tree, or simply tap on the necessary floor to select it, then open the Inspector > Object Properties tab and change the elevation to a negative value.
Work With Elevation and Moldings
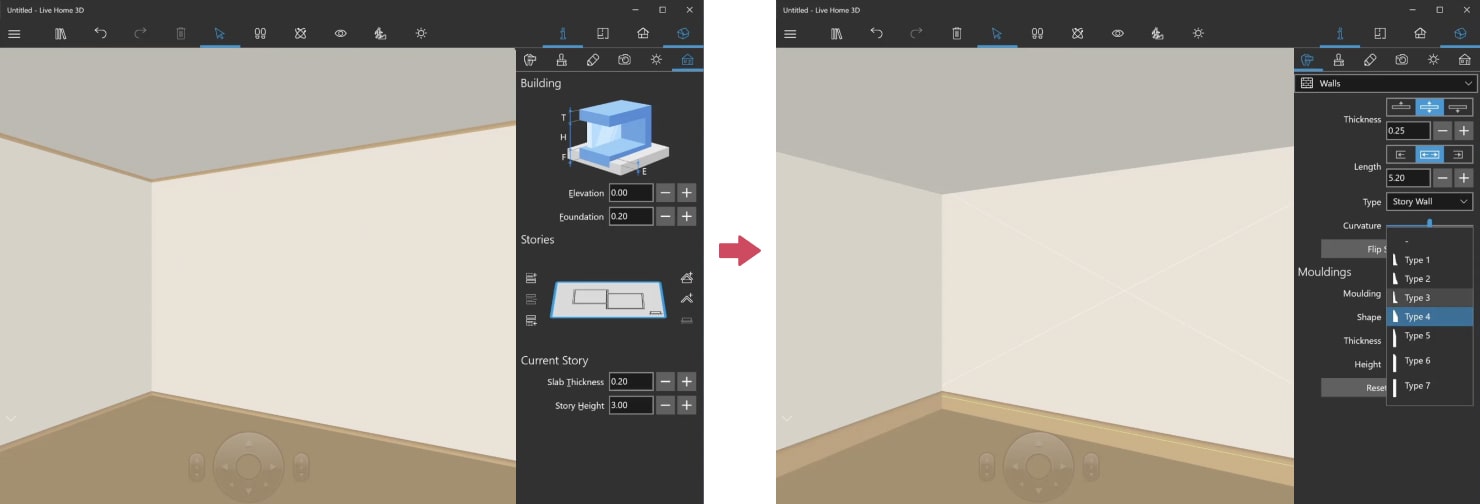
Now select the ceiling and change the elevation by deducting the same value to compensate for the difference. After that, you will need to remove moldings for each wall individually. This can be done through the Object Properties tab of the Inspector. However, there is a way to speed up the process and remove all moldings at once. You can select an entire room on a 2D plan and paint the lower part to match the color of the rest of the wall. It is important to know that you may lower the floor as long as you have a foundation underneath. If you need to lower it even more, simply make the foundation higher using the Building Properties tab.
Enjoy the Results
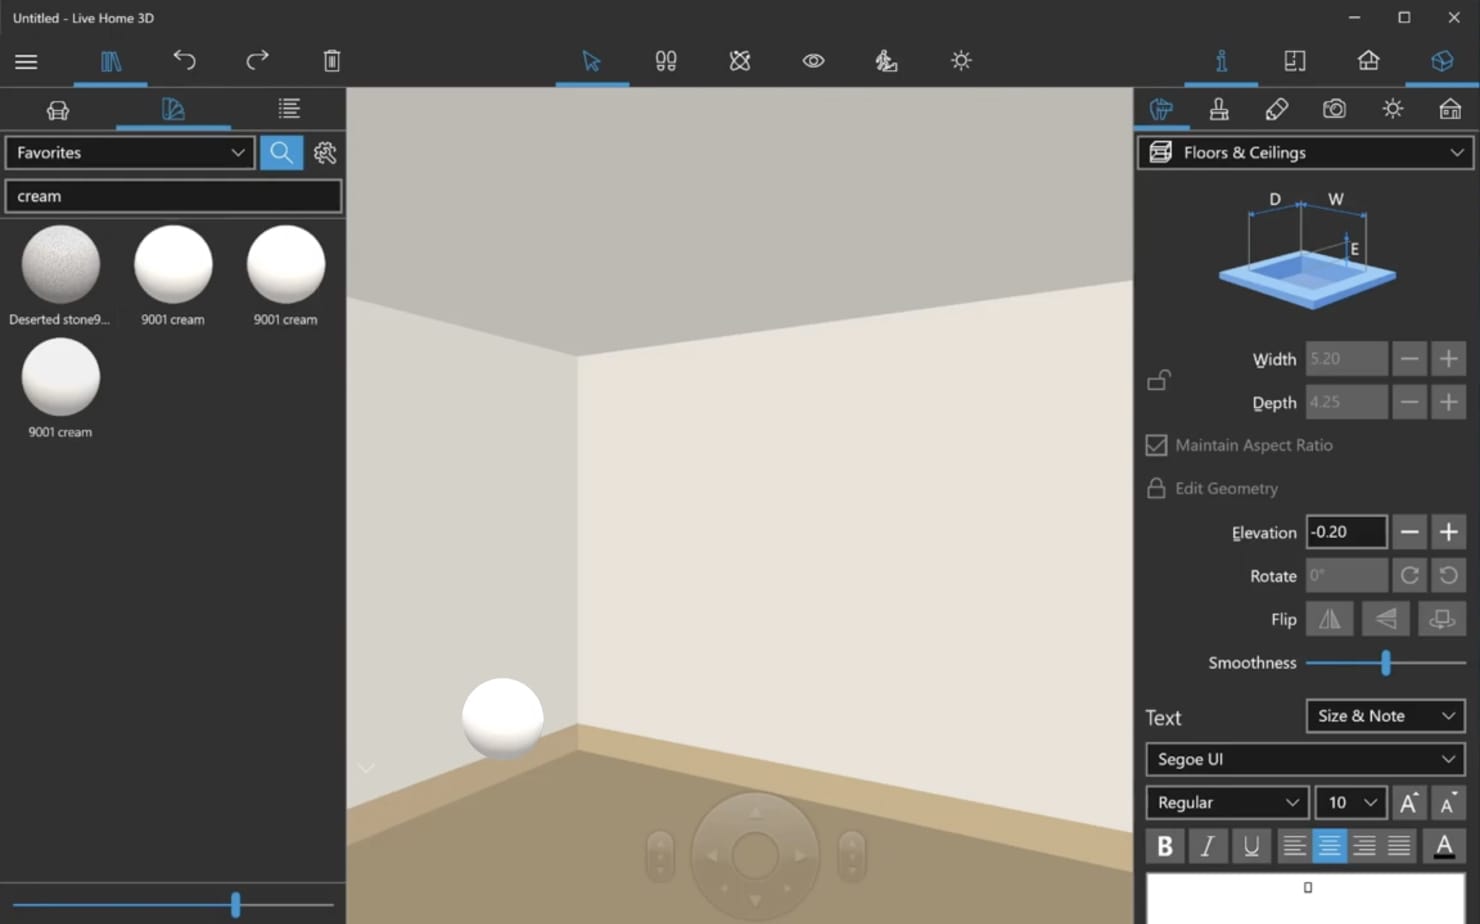
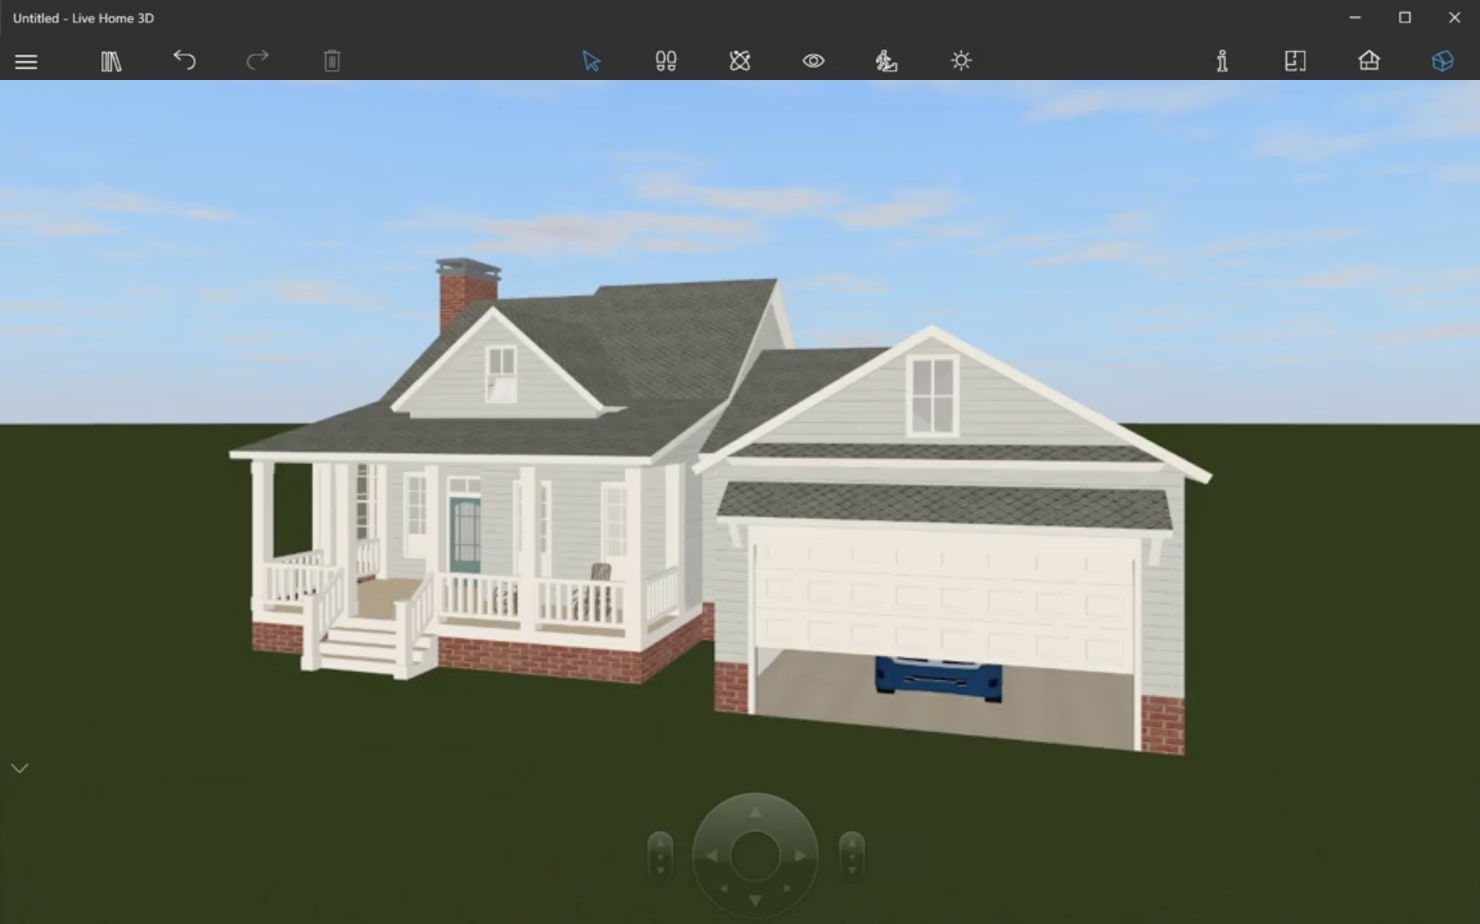
Using this technique, you can create something similar to a Small Cottage in the Live Home 3D’s Project Gallery. We can see below two rooms sitting on a foundation that equals 80 centimeters (31,5″). The floor in the garage was lowered to ground level.
Bigger Difference in Levels
Sometimes, the difference in levels is so large that you will not be able to compensate for it with the ceiling and floor elevation controls.
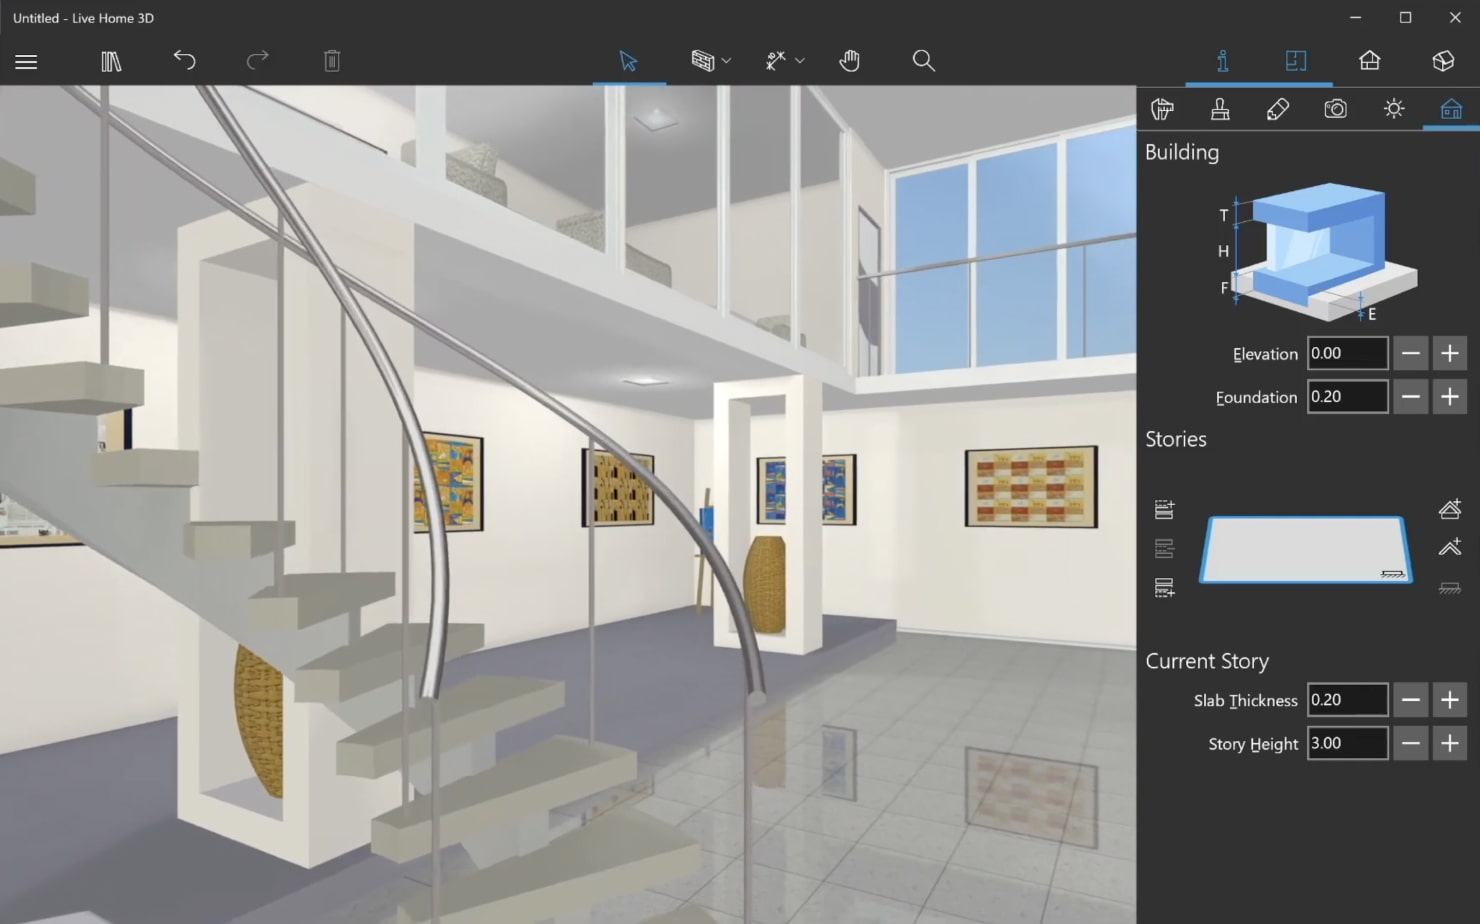
In this case, we recommend you use the Ceiling Opening tool in 2D plan view. For instance, if you want to create a room with a height of 4.5 meters (14.7′) and another adjacent room with a height of 3 meters (9.8′), you will need to follow these steps.
Create Rooms With the Lowest Room Height
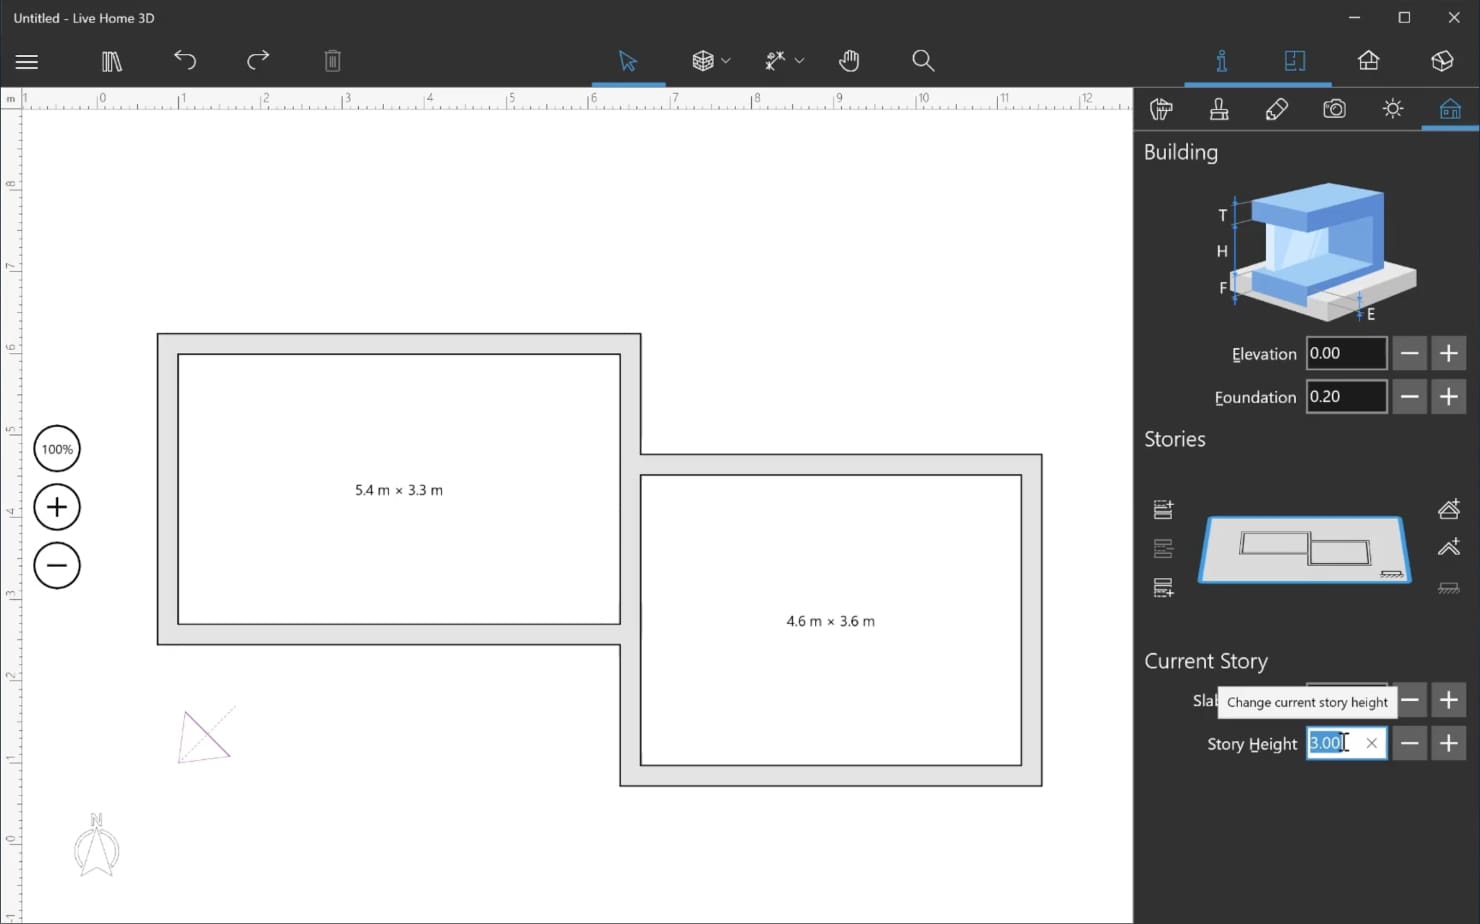
Create two rooms with the lowest room height. For example, let’s choose a height of 3 meters.
Add the Second Floor
Use the Building Properties tab of the Inspector to add a second story with a height that equals the difference between room heights minus the slab thickness: Ex: 4.5 meters (14.8′) - 3 meters (9.8′) - 0.20 meters (0.6′) = 1.3 meters (4.3′).
Merge the Rooms
Switch to the ground floor and create a ceiling opening to merge the lower and upper rooms to create a single room with a 4.5-meter (14.8′) height. Now, remove the molding for each wall and paint the slabs.
Two Adjacent Rooms With a Roof
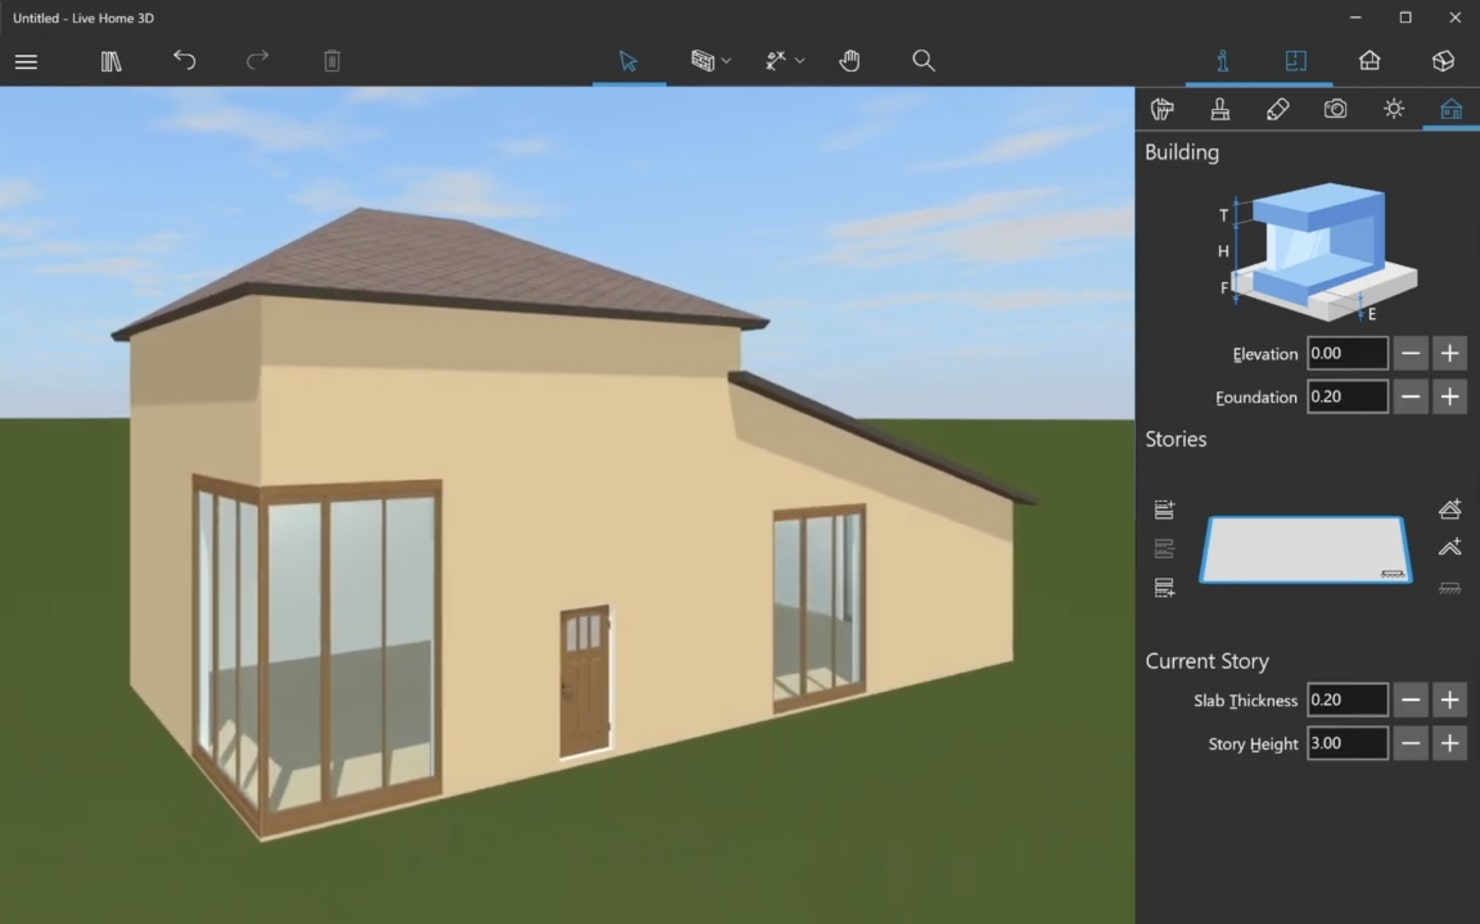
Another scenario with split levels is when you have two adjacent rooms with the roof above them.
Create Two Rooms and Add a Second Story
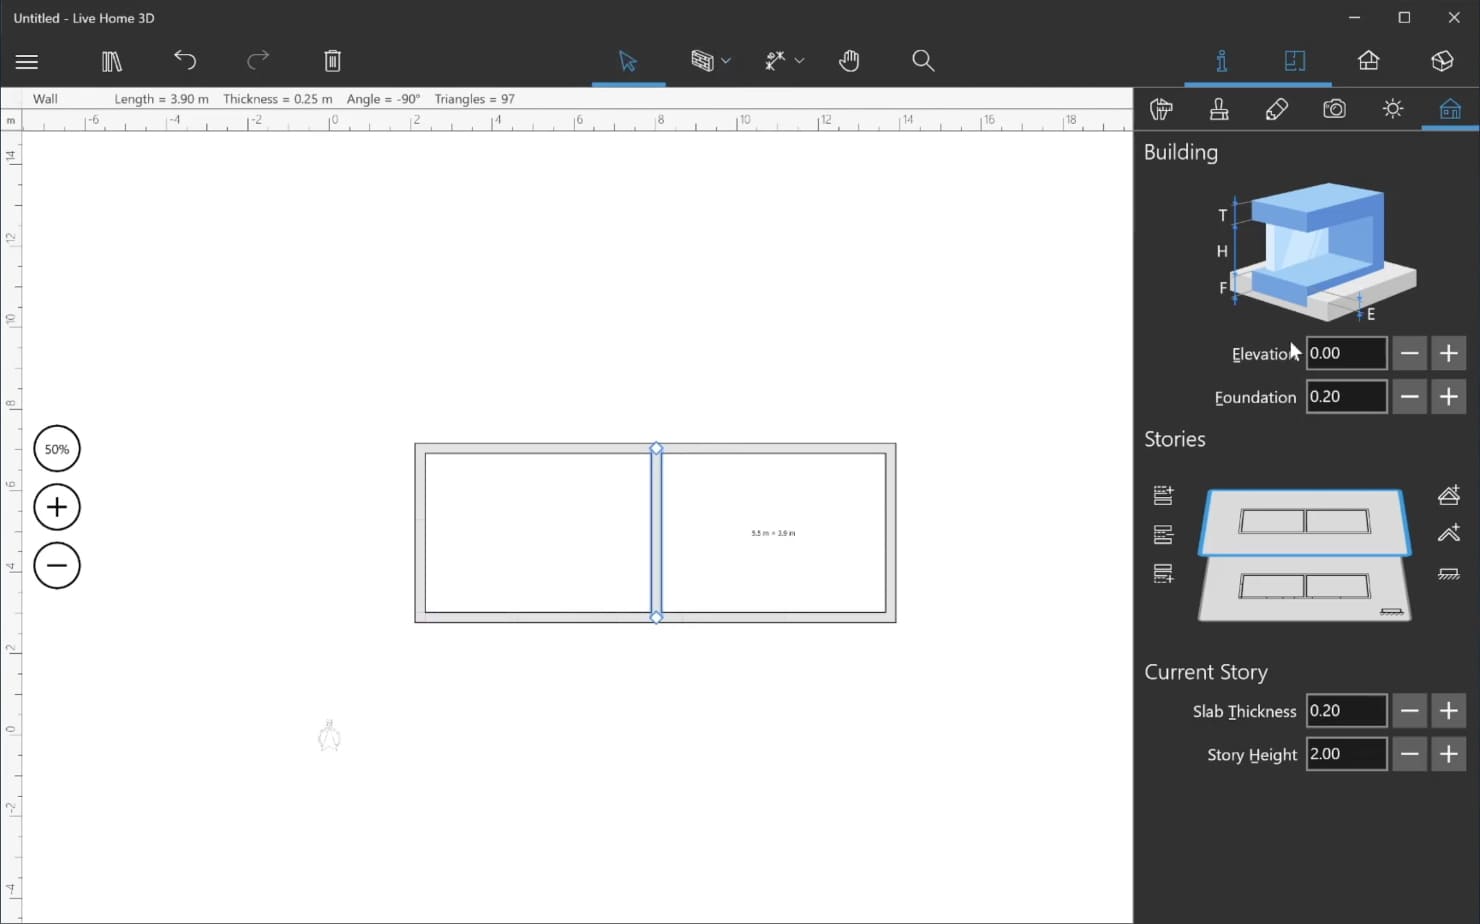
When you want to create that type of house, you will need to create two rooms on the 2D plan and add a second story by using the Building Properties tab of the Inspector. Then, build a missing wall between the two rooms on this story with the help of the Straight Wall tool.
Add an Autoroof and Change the Wall Type
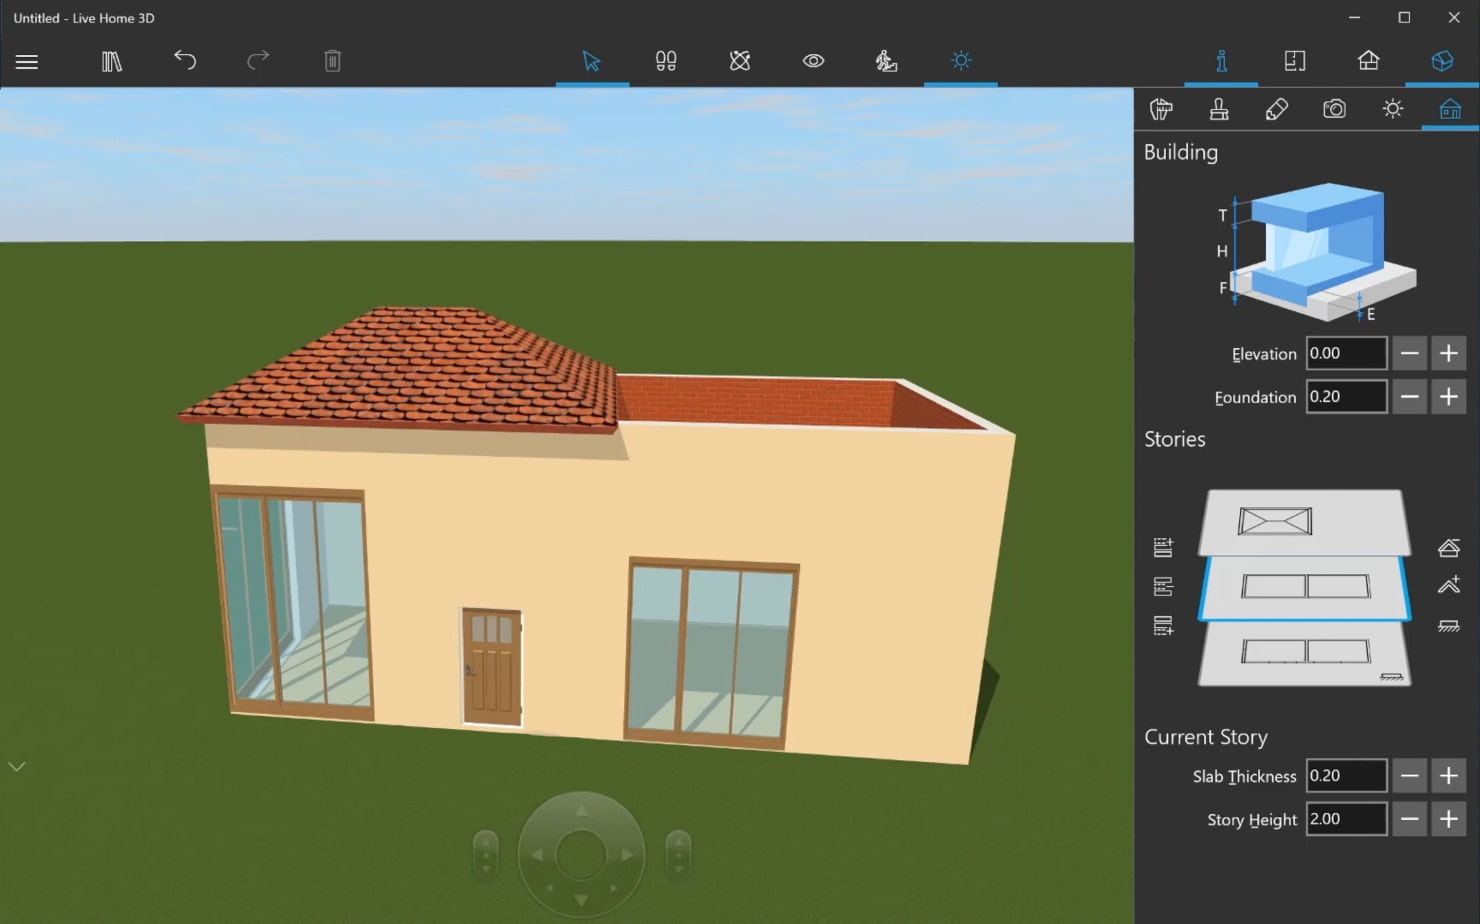
Now, add an Autoroof and select the room that should have a lower roof. Then, using the Object Properties tab of the Inspector, change the type of its three walls to Loft. Note that the adjacent wall should remain as is, and make sure the loft walls do not intersect with it. As can be seen in 3D mode, the roof appeared only above the room that does not have loft walls.
Add and Adjust the Roof
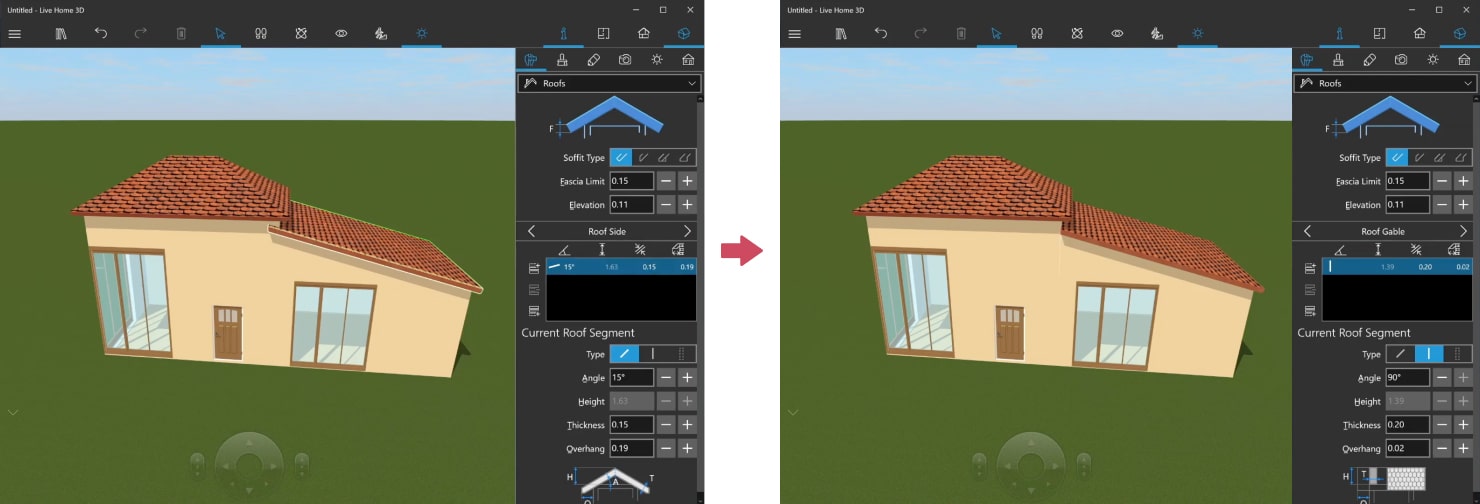
To add it for the second room, you will need to add an Autoroof on the current story, switch to the Object Properties tab of the roof and set the necessary elevation for it. If a part of the roof appeared inside the adjacent room, you may remove it by reducing the Overhang volume. The possibilities for roof editing are almost endless, especially if you have access to the Custom Roof tool in the Pro version.
Wrapping Up
Designing a split level house in Live Home 3D follows the same principles across all platforms, whether you use iOS, macOS, Windows or Android the version of the app. Once you master split level for one version, you can easily create them in others. Watch our comprehensive video tutorial below on designing split level houses using Live Home 3D for Windows.
Additionally, you can explore the Split Level Houses tutorials specifically-tailored for macOS and iOS on Youtube to ensure that you have all the resources you need to bring your split level house design ideas to life.
